Basic Blender to SVG Tutorial

After I posted about using Blender to output the stylized SVG of my head 3D model to plot with my AxiDraw, I wanted to do a basic tutorial since the settings I used in that post were specific to that technique. Sometimes you just need a simple version to spark your own explorations, and not get overwhelmed by stuff you won’t need on day one.

Since that first post, I have been introduced to the world of illusion edge-lit acrylic images. These are what appear to be wire-frames of 3D models, floating in mid-air, hologram-style, engraved into clear acrylic and edge-lit with LEDs. Since I recently received my Glowforge laser cutter, and other owners have been engraving pre-made designs, I realized the previous Blender to SVG technique is able to give us the right output to do our own custom designs!

Here are the steps to take a 3D object and output it as a SVG suitable for engraving (or scoring) on a laser cutter, or just for rendering a nice view of a 3D model. I’m going to use a single model, but you could set up any scene you want and follow the same steps.

NOTE: I’m using Blender 2.78b, and have enabled the “Freestyle SVG Exporter” add-in (in the Render section of Add-Ins in Preferences). I’m also using the Cycles renderer, not the Blender renderer as it may not have all the same abilities (depending upon version). Different versions of Blender may look slightly different, or you might have changed color schemes, but the functional steps should still be the same.

Step 1

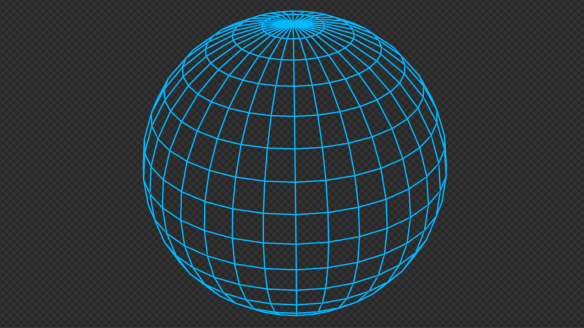
Starting with a blank scene, add a new object. In this example I added a UV sphere with 32 segments and 16 rings.

(Click any picture to enlarge)

Step 2

In the Render panel, scroll down to the Freestyle section and enable it.

Just above that is the Output section. Change the output location from the default (normally “/tmp”) to some location that is easy to get to. This is where the Freestyle SVG exporter will save your image.

Step 3

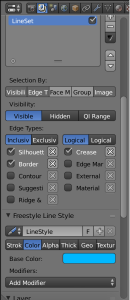
In the Render Layers panel, you will find several new Freestyle-related section. You’ll first want to scroll to the Freestyle Line Set section.

Click the little “+” next to the empty area and you’ll get a new line set called “LineSet”.

Step 4

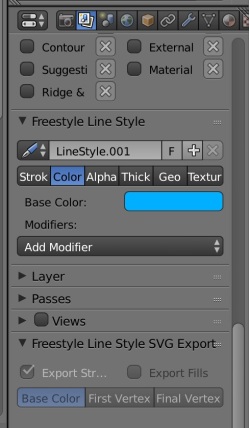
Scroll down below that section to the “Freestyle Line Style” section. You may have to click the triangle at the left of the section header to expand it. In this section, select the “Color” tab and change the color of your lines from something other than black (I chose a light blue in this example)

Step 5

Set your Blender camera to a nice looking position and render!

Yeah, that’s not very impressive. Yet.

Step 6

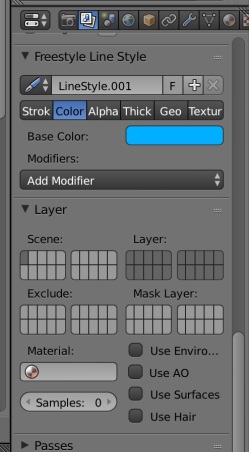
Head back to the Render Layers panel and scroll down to the Layer section. There you’ll find checkboxes (normally enabled) for “Use Environment”, “Use AO”, “Use Surfaces”, and “Use Hair”.

De-select all of these checkboxes.

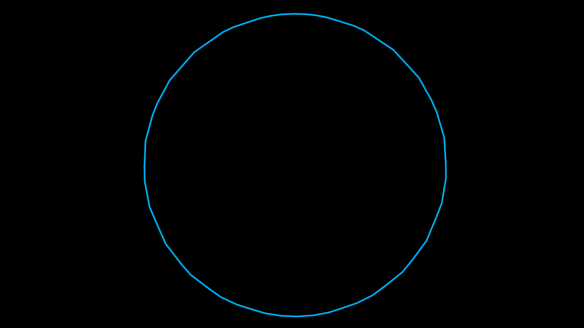
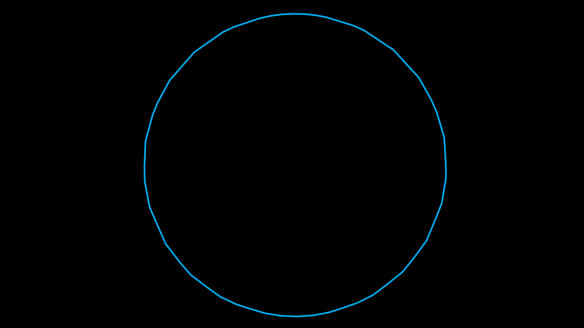
Render again and you’ll see just your lines! But they’re still not very interesting… just an outline of your model.

Step 7

Now the magic.

Select your model and press the Tab key to enter the Edit Mode view (or choose Edit Mode from the main window’s drop down). This should start with all vertices and edges selected and highlighted (orange by default).

Switch selection mode from Vertices to Edges.

Press the A key on your keyboard to deselect everything. Press A again to make sure all the edges of your model are now selected and active (orange).

From the Mesh menu, select Edges -> Mark Freestyle Edge.

Your edges will all turn yellow.

Step 8

Render!

Wut?

Step 9

Back in the Render Layers panel, scroll to the Freestyle Line Set section and you’ll find a checkbox labelled “Edge Mark”. Click the checkbox to enable it.

Step 10

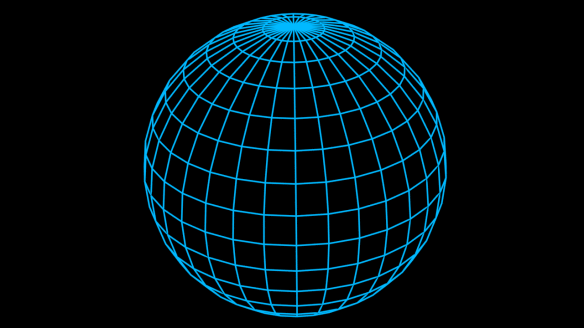
Render!

Wooooooooo!

Looks great but now we need a SVG.

Step 11

In the Render panel, all the way at the bottom you’ll find a section labelled “Freestyle SVG Export”. Click the checkbox to enable this section, and thus the exporting of your lines.

Bonus: Just above the Freestyle SVG Export section there is a section titled “Film”. In this section you can check the checkbox for the Transparent option. This will make sure there’s no background in your image (while I’m not 100% sure this outputs anything in the SVG, it is useful for compositing wireframes into other images).

Render!

Step 12

Navigate on your computer to the location you set for the output in step 2. There you will find a SVG file, most likely named “0001.svg”.

The file name is based on the current frame of your timeline. Since we started with a new scene and have not added any keyframe, animations, or have made any changes to the timeline, we are on frame 1 — thus 0001.svg.

Now you can take this SVG and plot it on a pen plotter, engrave it with a CNC or laser cutter, or whatever else you want to do with a SVG file!

Here is a model of a cone that I used this technique on, scored it into clear acrylic with my Glowforge, then edge-lit it with a RGB LED.

Tips

  • Sometimes objects don’t have as many edges as you might want. You can use the editing tools in Blender to subdivide certain sections, manually add edges, or use any of the mesh modifiers to design the edges you want.
  • Sometimes there are edges you don’t want to have in your render, or so many edges in a small section that they appear to be solid. While I marked every edge as a Freestyle edge, you can mark individual edges to get just the ones you want. Additionally there is the Clear Freestyle Edge option in the Mesh->Edges menu if you want to un-mark edges to make space.

Have fun!

3D Scan to SVG to Plotter (by way of Blender)

FreestyleScratchboard

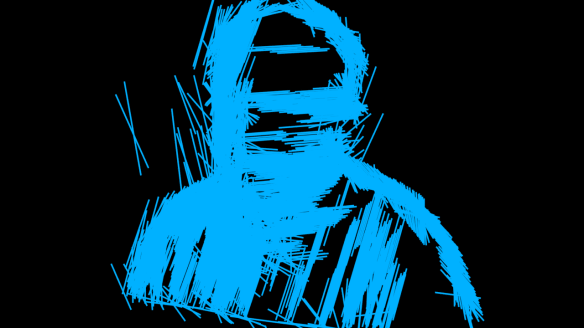
I recently learned that Blender has built-in SVG output capabilities using the Freestyle line rendering tool, which is awesome since I can now combine my love of 3D with my awesome AxiDraw plotter. In the course of playing with different models and the myriad options in the Blender Freestyle panel, I found some cool settings that create a very abstract, exaggerated style that looks great plotted. In the example above, I used the output from this technique to scratch the image into a scratchboard using a swiveling craft blade. It looks super cool both on-screen and on-board.

Here are the very simple steps to recreate this technique. Note I’m using Blender 2.78b with the built-in “Render: Freestyle SVG Exporter” add-on enabled.

Step 1

Start with a model. Here I’m using a scan of my head I’ve had laying around for a few years. This came from my Occipital Structure Sensor. Really, you can use any model for this, as each will result in interesting output.

001

Step 2

Enable “Freestyle” in Blender’s Render panel.

B002

Expand the “Freestyle Line Set” in the Render Layers tab, then create a new line set by clicking the little “+” icon next to the empty.

B002b

If you render now, you’ll see an outline around your model, as well as a few internal lines.

002

Step 3

You’ll need to change the color of the stroke to be able to see it after the next step. So in the Freestyle Line Set you created, expand the “Freestyle Line Style” group, then select “Color” and set the color from black to something not black. Here, I’ve chosen a light-blue color.

B003a

003

Step 4

We really just want to render the lines, not the model itself, so expand the “Layer” group in the same panel, and turn OFF “Use Environment”, “Use AO”, “Use Surfaces”, and “Use Hair”. Render and you’ll see a black background with your colored lines. (I couldn’t find a way to get a non-black background, thus the changing the color. If there’s a way to get a white background or something, I’d love to hear it)

B004a

004

Step 5

As it stands, the rendering may not look all that thrilling; it’s still cool, and there’s a lot you can do as-is, but it’s not what we’re going for. So let’s make the model a bit more interesting. We’re going to a “Remesh” modifer to our model, setting the Mode to “Blocks” and the Octree Depth to “8”.

B005a

The model now looks like millions of tiny cubes.

B005b

Rendering now already takes things up a notch.

005

Step 6

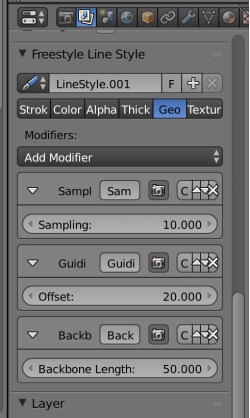
We now need to add a few modifiers to the lines. These are done in the Freestyle Line Style “Geometry” tab. We’re going to add “Guidelines” and “Backbone Stretch” via the Add Modifier dropdown.

B006a

And the render is taking shape!

006

Step 7

From here it’s a matter of tweaking some numbers, though the exact values are up to your aesthetic preferences. I picked “20” for Guidelines, and “50” for Backbone Stretch.

B007a

007

Step 8

This looks good, but a little heavy to me. So let’s change the line thickness to be thinner. In the Freestyle Line Style “Thickness” tab, set the Base Thickness to “1”.

B008a

Much better!

008

Step 9

The last thing to do is save the SVG. This is as easy as checking a checkbox, but also a little more convoluted than it needs to be, as you’ll see.

First, the checkbox to check is in the Render panel way at the bottom. Again, you’ll need to enable the Freestyle SVG Export add-on to see this.

B009a

Easy! Now, however, you’ll want the exported SVG file to go somewhere you can actually get to it! By default the exporter uses Blender’s temporary file path, which is normally a temp folder deep in the bowels of your computer. Let’s change that to something more accessible.

Scrolling up in the Render panel, find the “Output” section, and note that there is a folder in the textfield, something like “/tmp”. Click the little folder icon to the right and select a folder you’d like to save your SVG to.

B009b

That’s it! Next time you render your image, you’ll have a SVG file in the path you specified. Note that it takes the name of the frame you are working on, so most likely “0001.svg” if you are working on a single frame.

009

Important Final Step

From here I take the SVG into Inkscape, ungroup all of the lines until they are individual lines. With all the lines still selected (they should be selected after ungrouping), choose the “Simplify” menu option from the “Path” menu.

While all the lines look like single lines between two end points, they are made up of many, MANY individual points along the line. Doing the Simplify pass will reduce those down to two points and make your plotting go much smoother.

There is a way to do a simplification pass inside Blender, but I found that it merges lines in a way that I don’t care for.

From here

You can, of course, use any model you want, and play with values as you desire. There are quite a few Freestyle Line Style geometry modifiers including adding noise to the lines, warping with Perlin noise, or turning the lines into Bezier curves. Play around and have fun!

Future Relics

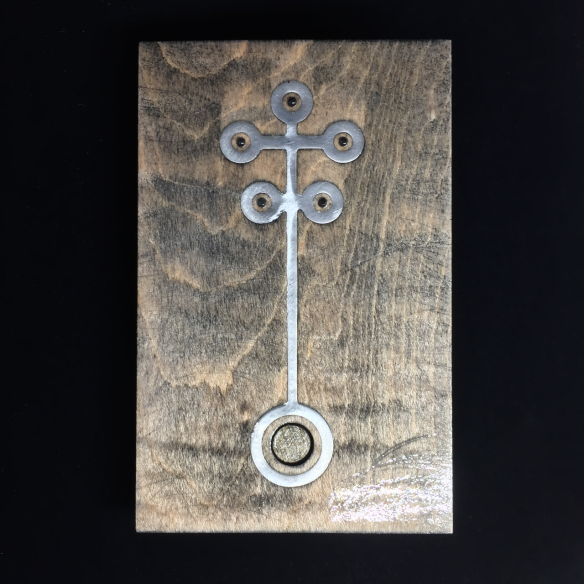
Here’s a thing I made while on vacation. While not intentional, the final appearance reminds me of something one would find in a cabinet in the basement of an old English church; a relic of a long-forgotten time, when people needed physical reminders of Saint Anatole’s 100 days of meandering through the desert before succumbing to the sand worms.

It is a piece of maple wood, a thin aluminum inlay, clear acrylic rods, and two custom circuit boards with an ATTiny85, some surface-mount LEDs, and a tiny reset switch (under a wooden button) all powered by a 2032 coin cell battery. All the wood and circuit boards were milled on my Othermill, with the circuits made in Eagle. The inlay and various SVG shapes for the cutouts were made in iDraw.

relic_ - 1relic_ - 2relic_ - 8

Is it jewelry if there are no jewels?

Brooch front

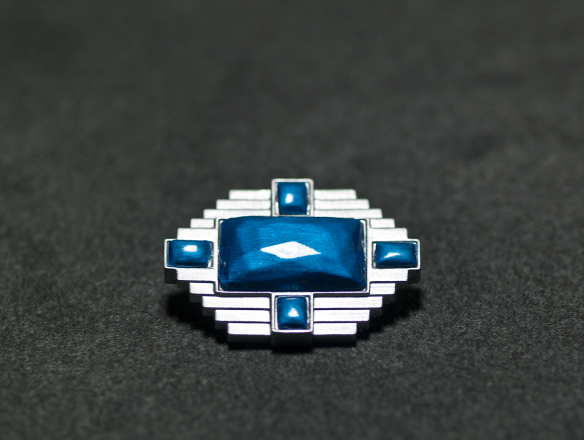
I’ve said before that the aesthetics of the Form 1 make me want to 3D print artistic things, not mundane things. Over the past 6-7 months, as I’ve messed around with smaller, more refined 3D objects, I’ve inadvertently strayed into an area that I have had no previous experience with: jewelry.

Continue reading

Unlocking the future. And gumball machines.

gumballOne way to keep morale up in a high-pressure, high-stress work environment is through candy. Lots and lots of candy. One of the guys at the office brought in several gumball machines he has and filled them with delicious sweets, mostly different flavors of M&Ms. Unfortunately while trying to unlock one of them he pulled the key out without it being aligned properly, thus making it impossible to get the key back in the keyhole. Co-workers tried all sorts of ways to get it working, but no luck. Finally one guy remembered I had 3D printers and asked if I could help and, well, I’m always up for a challenge.

Continue reading

Tiny chairs with the B9 Creator

[ UPDATE 02/23 – Added new gallery of macro shots at end ]

The last couple of years was both crazy and cool–getting to be part of the process from initial ideation to final release of a major consumer electronics device was quite the experience. Over the past six months, while I had time to make things, I didn’t have the brain power to write much. Since I’ve recently moved to a different product division, back in the ideation phase, my “little gray cells” have had time to catch their breath and also given me time to start writing again.

The first thing to get out is something I meant to do a long time ago: talk about 3D printing tiny chairs with the B9 Creator 3D printer.

B9 Creator Tiny Chairs

Continue reading

Printing the unprintable

candle_holder_3In the world of 3D printing, you’ll sometimes end up with models that — for one reason or another — just don’t want to be printed.

These models can come from anywhere: bad scans from Kinect or other DIY scanning solutions, objects made in 3D software that weren’t combined into a solid, or from code that creates 3D objects that were never intended to be made physical. This is a quick walk-through of how I was able to print one of these unprintable objects using a new, (currently) free app.

Continue reading

Formlabs Clear versus Shapeways FUD — a comparison

UPDATE: Fall 2017

In this rapidly-changing, technology-driven world, what is relevant one day can become meaningless the next. This post has some good info but IS HORRIBLY OUT OF DATE! 🙂

What I mean is that in the last four years since I wrote this post, there is a new version of the Form 1 (the Form 2) with new formulations of resin, and Shapeways has updated their materials a lot as well. While I’m tempted to remove this post, I think the ancillary information and anecdotes are still good, even if the quality comparison in today’s market is meaningless.

The works I’ve seen coming off the Form 2 are super-quality (I still only have my Form 1+), and I’m pretty much only using Shapeways for metal and porcelain prints these days, so I am not able to update with new useful information. Take this post with that grain of salt. 🙂

—–

In certain circles, FUD means “fear, uncertainty, and doubt”. To others it means Shapeways’ “frosted ultra-detail” 3D print material. Yet to others FUD has an entirely different meaning. Today we’re talking about the Shapways 3D printer material, and how it compares to the Formlabs Clear resin.

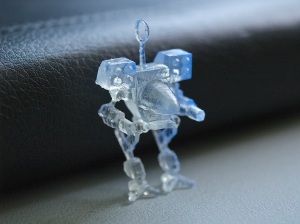
A couple of weeks ago I printed a tiny robot pendent and a tiny mech pendent and posted them to Thingiverse. I posted pictures of the prints from my Form 1, which led to discussing the Form 1’s quality with Kacie Hultgren of Pretty Small Things fame. While she is able to print a number of her miniatures on her Makerbot, she also uses Shapeways for items with small details, and is considering adding a Form 1 to her workflow. We decided it would be great to test the Form 1 Clear resin and Shapeways FUD side-by-side and learn what was to be learned, so she emailed me three of the STL files she previously had printed by Shapeways and I got to work.

Continue reading

The thin wall

No, not the Ultravox song, the test of 3D printer resolution.

mecha_3A little background: a few days back I made a small robot pendent for my wife. She liked it, but immediately asked “what about a mech?”. I really am no good at modeling mech — I’ve tried, and just, no — so I went to Thingiverse and found a really cool MadCat mech model that I could turn into a pendent.

Since I wanted to push the resolution of the Form 1, I added a few extras like rockets in the shoulder rocket launchers and gun barrels in the arms. I also added the post and loop to make it a pendent.

Continue reading