After I posted about using Blender to output the stylized SVG of my head 3D model to plot with my AxiDraw, I wanted to do a basic tutorial since the settings I used in that post were specific to that technique. Sometimes you just need a simple version to spark your own explorations, and not get overwhelmed by stuff you won’t need on day one.
Since that first post, I have been introduced to the world of illusion edge-lit acrylic images. These are what appear to be wire-frames of 3D models, floating in mid-air, hologram-style, engraved into clear acrylic and edge-lit with LEDs. Since I recently received my Glowforge laser cutter, and other owners have been engraving pre-made designs, I realized the previous Blender to SVG technique is able to give us the right output to do our own custom designs!
Here are the steps to take a 3D object and output it as a SVG suitable for engraving (or scoring) on a laser cutter, or just for rendering a nice view of a 3D model. I’m going to use a single model, but you could set up any scene you want and follow the same steps.
NOTE: I’m using Blender 2.78b, and have enabled the “Freestyle SVG Exporter” add-in (in the Render section of Add-Ins in Preferences). I’m also using the Cycles renderer, not the Blender renderer as it may not have all the same abilities (depending upon version). Different versions of Blender may look slightly different, or you might have changed color schemes, but the functional steps should still be the same.
Step 1
Starting with a blank scene, add a new object. In this example I added a UV sphere with 32 segments and 16 rings.
(Click any picture to enlarge)
Step 2
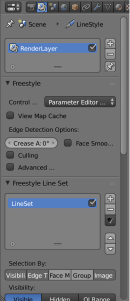
In the Render panel, scroll down to the Freestyle section and enable it.
Just above that is the Output section. Change the output location from the default (normally “/tmp”) to some location that is easy to get to. This is where the Freestyle SVG exporter will save your image.
Step 3
In the Render Layers panel, you will find several new Freestyle-related section. You’ll first want to scroll to the Freestyle Line Set section.
Click the little “+” next to the empty area and you’ll get a new line set called “LineSet”.
Step 4
Scroll down below that section to the “Freestyle Line Style” section. You may have to click the triangle at the left of the section header to expand it. In this section, select the “Color” tab and change the color of your lines from something other than black (I chose a light blue in this example)
Step 5
Set your Blender camera to a nice looking position and render!
Yeah, that’s not very impressive. Yet.
Step 6
Head back to the Render Layers panel and scroll down to the Layer section. There you’ll find checkboxes (normally enabled) for “Use Environment”, “Use AO”, “Use Surfaces”, and “Use Hair”.
De-select all of these checkboxes.
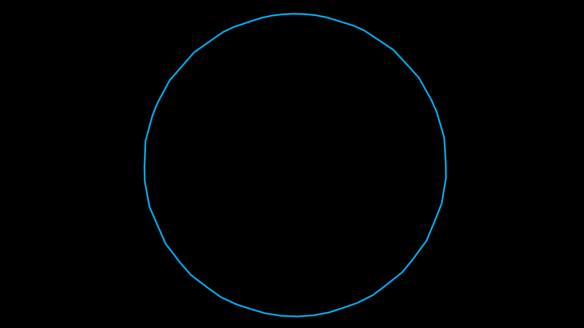
Render again and you’ll see just your lines! But they’re still not very interesting… just an outline of your model.
Step 7
Now the magic.
Select your model and press the Tab key to enter the Edit Mode view (or choose Edit Mode from the main window’s drop down). This should start with all vertices and edges selected and highlighted (orange by default).
Switch selection mode from Vertices to Edges.
Press the A key on your keyboard to deselect everything. Press A again to make sure all the edges of your model are now selected and active (orange).
From the Mesh menu, select Edges -> Mark Freestyle Edge.
Your edges will all turn yellow.
Step 8
Render!
Wut?
Step 9
Back in the Render Layers panel, scroll to the Freestyle Line Set section and you’ll find a checkbox labelled “Edge Mark”. Click the checkbox to enable it.
Step 10
Render!
Wooooooooo!
Looks great but now we need a SVG.
Step 11
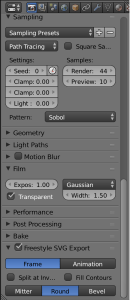
In the Render panel, all the way at the bottom you’ll find a section labelled “Freestyle SVG Export”. Click the checkbox to enable this section, and thus the exporting of your lines.
Bonus: Just above the Freestyle SVG Export section there is a section titled “Film”. In this section you can check the checkbox for the Transparent option. This will make sure there’s no background in your image (while I’m not 100% sure this outputs anything in the SVG, it is useful for compositing wireframes into other images).
Render!
Step 12
Navigate on your computer to the location you set for the output in step 2. There you will find a SVG file, most likely named “0001.svg”.
The file name is based on the current frame of your timeline. Since we started with a new scene and have not added any keyframe, animations, or have made any changes to the timeline, we are on frame 1 — thus 0001.svg.
Now you can take this SVG and plot it on a pen plotter, engrave it with a CNC or laser cutter, or whatever else you want to do with a SVG file!
Here is a model of a cone that I used this technique on, scored it into clear acrylic with my Glowforge, then edge-lit it with a RGB LED.
Tips
- Sometimes objects don’t have as many edges as you might want. You can use the editing tools in Blender to subdivide certain sections, manually add edges, or use any of the mesh modifiers to design the edges you want.
- Sometimes there are edges you don’t want to have in your render, or so many edges in a small section that they appear to be solid. While I marked every edge as a Freestyle edge, you can mark individual edges to get just the ones you want. Additionally there is the Clear Freestyle Edge option in the Mesh->Edges menu if you want to un-mark edges to make space.
Have fun!


Thanks to your post, I can now render 3D models in neon. Keep it up, Gregg!
This is what I’ve been looking for! I’m new to blender so my first few try’s didn’t work. Practice makes perfect! I’m not opposed to additional help. Thank you! Love your tutorials!
Does this steps work for version 2.78c
They should, but I have not tried here. Give it a go and let us know! 🙂
Thank you so much for this tutorial! You just made my plot material a lot easier to make. Cheers!
Hello!
I’ve been trying to do this but the render never shows anything juts black.
I follow step by step and nothing changed.
Help! 😦
First, double check your settings from Step 4 above where the line color gets set. That’s the primary thing I can think of that would give you all black screen.
Another thing to check is to save the SVG file (do all the steps as if you could see the lines) and then load the SVG into a app where you can view SVGs – Inkscape, Illustrator, or even a web browser. If it’s blank, then there’s something else wrong.
Finally, what version of Blender are you using? Perhaps there’s something in the latest versions that I’m not aware of that changes things.