
 In the world of 3D printing, you’ll sometimes end up with models that — for one reason or another — just don’t want to be printed.
These models can come from anywhere: bad scans from Kinect or other DIY scanning solutions, objects made in 3D software that weren’t combined into a solid, or from code that creates 3D objects that were never intended to be made physical. This is a quick walk-through of how I was able to print one of these unprintable objects using a new, (currently) free app.
It all started many months ago when I was turned on to a great list of software that lets people create generative art by writing code. One of these is Structure Synth, which allows for the creation of generative 3D scenes. (Though Structure Synth hasn’t been updated in several years, it has a full set of features including raytraced renderings with reflections and shadows, in addition to all the cool generative stuff).
Structure Synth works by writing “rules” that define how it should add objects — mostly simple primitives like boxes and spheres — to the scene, adjusting scale, rotation, color and other attributes. You can have multiple rules with the same name, which will then be selected randomly when called from other rules, allowing for easy variations on a theme.
After a few days of playing around in Structure Synth, I had enough understanding to try to make something that I could print. I like rotational symmetry (it’s easy math) and useful items, so I set out to make some sort of vase-like object. I ended up with a candle holder.
-
- Structure Synth UI
-
- Scene rendered in-app
I loved the final shape and decided I wanted to make it real, so I exported the scene as an OBJ file from Structure Synth and started to get to work. That’s when I hit the big problem: the object wasn’t a single solid object — it was made up of over 100 individual 3D boxes. I knew this wouldn’t print as-is so I started looking for a solution.
I could open the OBJ in Blender, but the process of merging all of the separate blocks into a single object was tedious and slow, and quite taxing on my aging MacBook Air (not the most powerful of machines). There were several different importers for Structure Synth scenes into Blender and other 3D modelling software packages, but these still didn’t create for easy merging.
I tried exporting the model as an STL from Blender to send through several cloud-based model repair services, including the awesome Netfabb service, but it was not able to be “fixed”.
Since I could look at the virtual object from any angle and it appeared to be a solid, I thought there should have been some way to have a piece of software see it the same way. I could imagine a software version of a laser scanner: put a model on a turntable, shoot a laser at it, and recreate the outer shell based on how the laser reflected; shoot the laser from all sides and directions and you have a solid 3D model. In trying to find something that fit this description, I learned this is called “resurfacing” and that there were applications that could do it! Unfortunately for me, the apps that could were either outside of my price range, not available for OSX, or would crash when I fed it my object, so my model sat on a virtual shelf for several months.
Then one day I saw a post about Autodesk Lab’s Project Miller. It said it had resurfacing tools, was OSX-compatible, and available as a free demo (at least until the end of 2013). Maybe this one would work? I gave it a whirl.
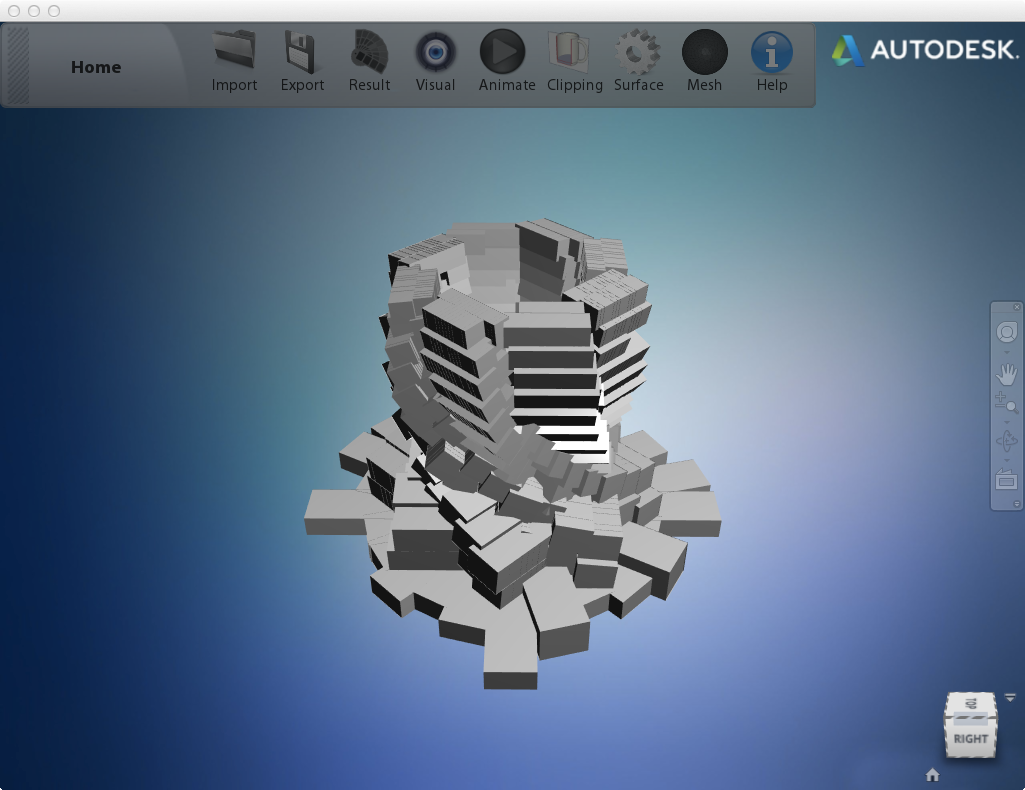
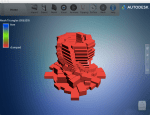
Main interface of Project Miller from Autodesk Labs.
There’s not much to the program — just a smallish window with some basic controls. I loaded the STL file I had of my candle holder, pressed the “Surface” button in the toolbar, and selected 512 (the first option in the list). Holy cow it worked! It unfortunately wasn’t as detailed as the original. Guessing that the numbers in the surface option list were resolution settings, I picked the middle option of 2048 and waited. After a few minutes I had a solid version of my candle holder, and my poor laptop’s fans were blowing hard to keep the temperature down; it was an intense process for it, better suited for a beefier laptop or workstation.
I saved my new object as an STL and discovered that it was a HUGE file, weighing in a whopping 530MB!! I went back into Project Miller to see if there was anything else I could do. Thankfully I found there were tools in the “Mesh” menu to let me optimize the model. I started at the 200k setting and it spun and spun and finally gave me a model that was now only 43MB. This wasn’t the lowest setting, however, so I went ahead and did a reduction of the 200k version using the 50k setting. Quickly I had another version that looked as good as the original, but was only 10MB; this I could work with.
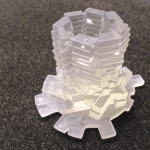
-
- Object surfaced at 512. The edges of the boxes are kind-of rounded soft.
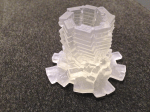
-
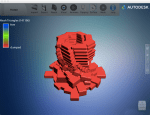
- Object surfaced at 2048. Note the sharper edges and the high number of triangles.
I loaded the new STL into PreForm — the software that my Form 1 3D printer uses — and it complained the model had integrity issues. It asked if I wanted to repair it so said yes, and apparently it worked okay as it didn’t say it still had problems. I selected the clear resin at the 0.1mm layer height setting and got it printing. It took a little over 3-1/2 hours, but it came out looking beautiful! It also came out about 4-5mm too small to hold a normal candlestick! I took it back into Blender and scaled it up to the correct size for US-sized candlesticks, though I haven’t printed a new one to make sure it’s correct.
While I haven’t run a wide assortment of items through Project Miller, it has handled what I have tried. Having this sort of tool makes me want to keep creating more “things” in code since I know I’ll have a way to make whatever I can program into something printable. There’s only a little over a month left of the demo, but I hope it stays around (and free).
If you know of other apps that do resurfacing, please let me know. I’ve tried MeshMixer, MeshLab (crashy, crashy), Netfabb, CADSpan, and scripts in Blender. I saw there were plugins for FormZ and ZBrush, but don’t have these apps.
My Structure Synth candle holder script: view on Gist
Download the STL and print your own: Candle Holder on Thingiverse


It probably wouldn’t work for this part, but I frequently add small circular or rectangular pads to my prints to tack down corners and protrusions. I add them as .stl files in Repetier and just move them until they intersect the main model. Repetier barks at you if you have intersecting objects, but allows you to proceed and Slic3r usually doesn’t have much of a problem with them. It would be interesting if you tried running this as-is (lots of intersecting boxes floating in space) through Slic3r just to see what happens!
Good tips about adding pads; while it’s not something that would help with this model, that is a trick everyone should know about.
I just ran the original model through slicer and though it said it repaired 8400+ triangles, the results looked like this:
Pretty much how RepG and PreForm looked, doomed from the get go. 🙂
Not sure why my image is showing up… here’s the pic:
g.
Yeah… that’s not going to print 😉
Pingback: 20 Cool Things to Make on an SLA 3D Printer – 3DPrintWire
Pingback: Tutorial Tuesday 27: Design for Complexity With Structure Synth - Shapeways Magazine
Pingback: Design for Complexity With Structure Synth – Hacktastic