

I’ve said before that the aesthetics of the Form 1 make me want to 3D print artistic things, not mundane things. Over the past 6-7 months, as I’ve messed around with smaller, more refined 3D objects, I’ve inadvertently strayed into an area that I have had no previous experience with: jewelry.
Let me start by saying I’m not a jewelry designer, never wanted to be, and don’t plan to be, so my take on this is not going to address all the things real jewelry makers would look for and think about.
However, to me this is yet another example of when the capabilities of your tools allow you to try new things and experiment with ideas in a quick and easy way, without consequence (other than a little less resin). I’m still convinced this process of desktop innovation is one of the most impactful outcomes of owning your own 3D printers, especially ones with increasingly higher resolutions.
So after printing the small robot and mech pendants many months ago, I wanted to try out some other ideas I’ve had bouncing around my brain. First up was a nature-meets-digital artistic piece.
Slicing rocks
I like going out into nature and looking at all of the things in the environment, from the snowy peaks, and grand firs, down to the small rocks in their myriad permutations. Many rocks in the area are solid gray stone with very straight bands of a different composition running through them. These always make me ponder what just those inner slices of material look like on their own. This question inspired me to take one of my previous experiments where I created generative rocks, and adapt it to the task.
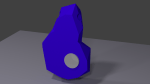
 My first goal was to create a very angular rock. I wanted it angular to appear more quartz crystal-like than smooth river rock. I did this by first creating an organic, smooth stone shape, then decimating it to a very small number of triangles. Once I had this shape, I then took a slice out of it, creating a form that was super smooth on two, larger sides, with the edges being angular and rough. This form was nice, but I wanted to add to the digital/nature bit so I cut a cylinder out of it, running through the smooth sides. Unlike rocks you might find with holes in them, my goal wasn’t to leave the hole empty. Rather, I wanted to take the cylinder and paint it a different color, and place it back into the main part after things had dried.
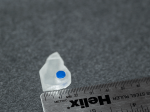
I also cut out a horizontal cylinder for running a cord or chain through, then sent the main piece and the cylinder to my Form 1. As this was during the time my Form 1 was in too-cold of a room, I had to print several copies just to get a couple that were acceptable. Part of me likes some of the glitches in the prints (it’s consistent with the small imperfections in nature), but I also wanted it to be digitally, clinically, perfect. Since I had a few copies, I painted one blue with a clear cylinder, and another clear with a blue cylinder. I used Liquitex Cobalt Blue Hue spray paint over a Krylon for Plastic matte white base (the blue color in the pictures is not true-to-life, it is very hard to get photographed correctly, even with the best white balance I could muster).


Full metal robots
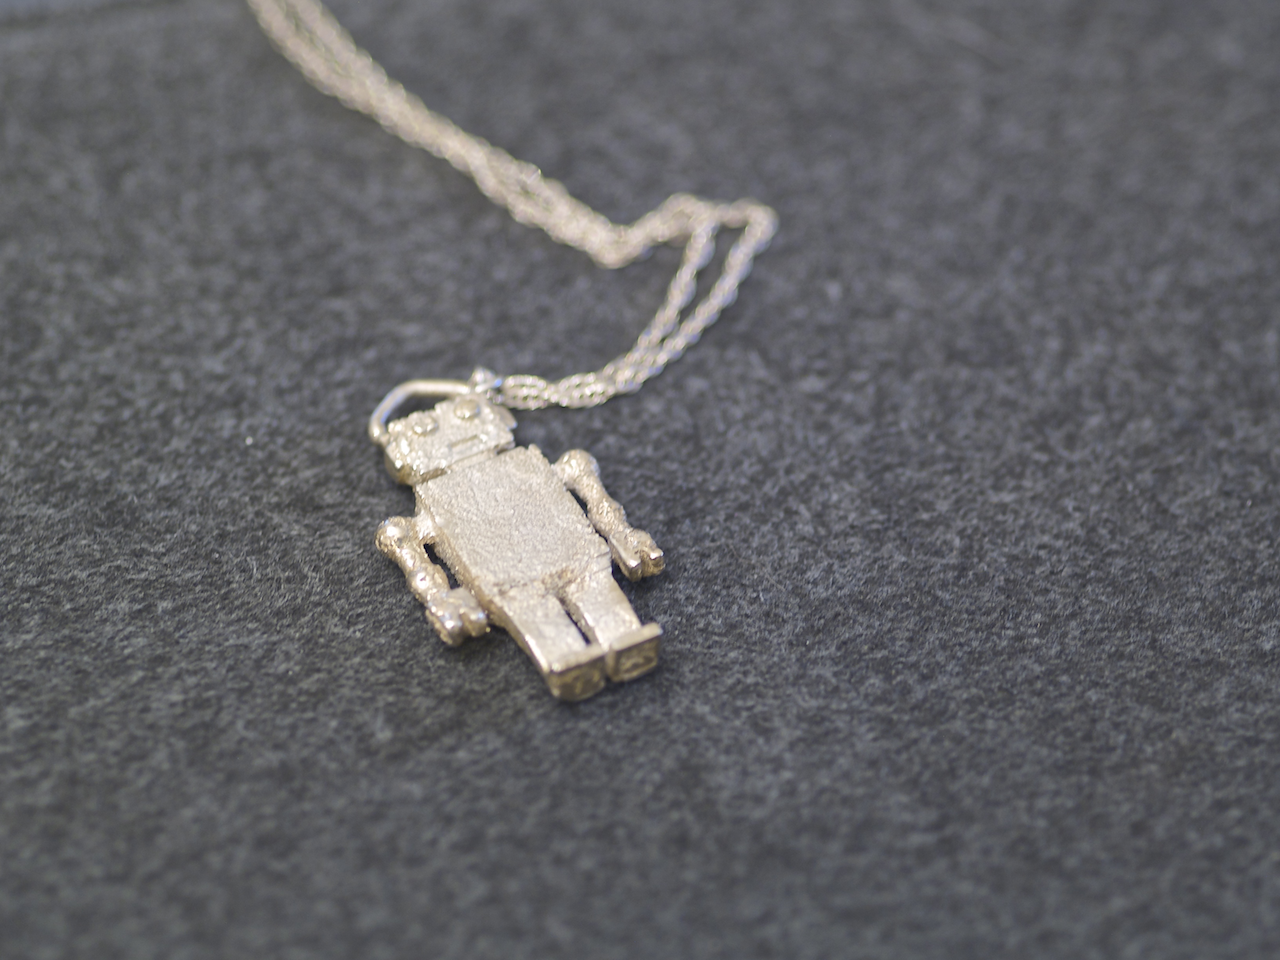
Many months ago, I also worked with real jewelry designer Bob Krug of Imagine Jewelry Studio to see if the Formlabs clear resin was able to be cast into metal. This is a process that I know nothing about, but Bob does it all the time, so I trusted his skills. He had sent me a couple of STL files–one of a ring, one of a small mushroom pendant–to output on the Form 1 and send back to him. He also offered to try one of my tiny robots, if he could get the casting process working with the prints.
We quickly learned that it was not to be… The Formlabs resin just wouldn’t burn out cleanly, which meant that all of the metal casts of objects were rough, having bumps and pock marks, and losing finer details. He sent me one of the test casts of my robot, and I actually like it a lot, as the imperfections make it look old, weathered, and maybe battle-worn.
Generative forms
 I’ve posted before about using non-standard tools to create 3D models, for instance coding them in Processing. I had coded a wave-shaped grid with some perlin noise added to the middle and had it 3D printed by Shapeways. It was quite large, measuring around 7-inches long. While it would have fit in my Form 1, this was during the time I wasn’t having much luck with the printer, so I didn’t want to potentially waste a lot of resin.
However, once we determined that the Form 1 and resin were just too cold, and I had moved it into a warmer environment, I thought the first thing I should try was something small and intricate. So I took the STL file I had sent to Shapeways and made it smaller. Much smaller. It ended up at around 2-inches long.
The warmer locale worked like a charm and my grid came out beautifully! It was the perfect size for a pendant, so I decided to paint it. I opted for using iron paint (with real iron) and splashing a rusting medium on it. I used a bit too much rusting medium and it came out quite shiny; not the matte rust I was hoping for. Oh well, I still like it.


Glitz and glamour
One day I saw a pendant with my wife’s jewelry that I thought looked nice, but noted she hadn’t worn. She doesn’t normally wear necklaces with pendants that aren’t robots, but she does wear brooches. The back of this pendant wouldn’t support a brooch pin so I thought I’d surprise her and re-create it as a brooch.
 I went straight into blender as the majority of the brooch was simple elongated cubes. The original pendant had these nice, black rhinestones in it, as well as a lot of small clear ones (it was a bit gaudy). I thought it would look a bit more art-deco if I made it a bit more minimal, and stair-stepped the blocks instead of them being flattened like the original.
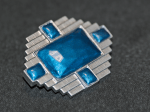
I decided to reduce the total number of “gems” on the brooch, opting for one in the middle with four around it, one at each cardinal point. To create these, I made a two cubes with rounded corners in Blender, and then decimated them to get a random faceted look. I left one big and scaled the other down for the four sides.
After sending to the Form 1, I painted the base brooch with a silver paint I had laying around. The gems were painted with five or six layers of a glossy metallic blue model paint.
I put a pin on the back and gave it to my wife. She then informed me that she liked it, but she didn’t but the original pendant because she like it, she bought it for the chain it was hanging on. It’s the thought that counts, right? 😉
I’ve shared the model on Thingiverse so you can make your own.

Scubamech
After my wife saw the brooch, the thought hit her “why don’t I get him to make me things I actually want?!”
 When she came to me and asked me if she could draw something and I could make it into a pendant, I happily said “of course!” and anxiously waited to see what she came up with. Before long she had sketched up a “scubamech”–a robotic scuba diver–in Photoshop and sent me a copy. I opened the file in SketchUp as I find it the easiest app to trace an image in then immediately turn it into a 3D model.
I traced it as accurately as I could, turning her shading marks into raised details, and added a few bits and bobs here or there to fill in the empty space more. Since she had asked if we could print it in metal via Shapeways, I made sure the small bits were within their detail limits.
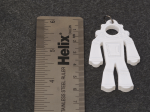
It took 30 minutes to sketch and detail before I sent the first version to the Form 1. Three hours later I had a 3D-printed scubamech! After I spray painted it with matte white paint to bring out the details, she gave it a look and asked that I clean it up, making it more symmetrical and change the dots I had put on the empty chest into something more like an access panel.
I also took the time to upload the first version to Shapeways to see if there were issues with getting it printed in metal. There were. Some of the outer-edge recessed details were too thin; a problem that could be resolved by making the whole thing 1mm thicker. I also needed to enlarge the opening where a metal ring for hanging on a chain would go, as the metal-printing process would shrink slightly.
I printed the second version and it was better, and she liked the panel on the front. However, I had made the ring at the top much too large. So back to SketchUp and rework that area.
For the third version, I made the top ring hole part look more like the other sections around the helmet, and this one got the thumbs up! I checked the file at Shapeways and we’re good to go with getting it in metal.
Since “matte black steel” was her material selection, I went to a local hobby store and got some “gun metal” model paint that seemed like it was close to the pictures on Shapeways. I painted the first scubamech as a test and it looks really cool; it came out quite metallic.
-

- Scubemechs! Versions 1 and 2
-

- Scubamechs versions 2 and 3

Final thoughts
Once again, I find that having a 3D printer has given me the opportunity to experiment and try things that I wouldn’t normally be able to do. While I won’t be putting real jewelry designers out of business, I’ve been able to take ideas in my head and make them into real, wearable items. It’s also given my wife the ability to see her visions come to life, as without a 3D printer the thought of being able to make something like this wouldn’t have even come up.
Keep trying things you’re not used to–you never know where it will lead.

